Table of Contents
Setting up the portal
This article is part of the Administrator manual and applies only to users with access to Plant Preferences. What Is the eKaizen Portal? The Project Charter is a key component of project management a…

What Is the eKaizen Portal?
The Project Charter is a key component of project management and tracking in eKaizen, working alongside Project Types and Submission Forms to ensure structured documentation of improvement projects. It provides a dedicated space where all relevant project details can be stored, viewed, and updated as needed.
The setup process follows the same logic as submission forms, using a drag-and-drop layout to arrange fields and elements.
Step-by-Step Setup
- Configure Basic Settings
Navigation: Go to Plant Preferences -> Screens & Forms -> Project Charter.
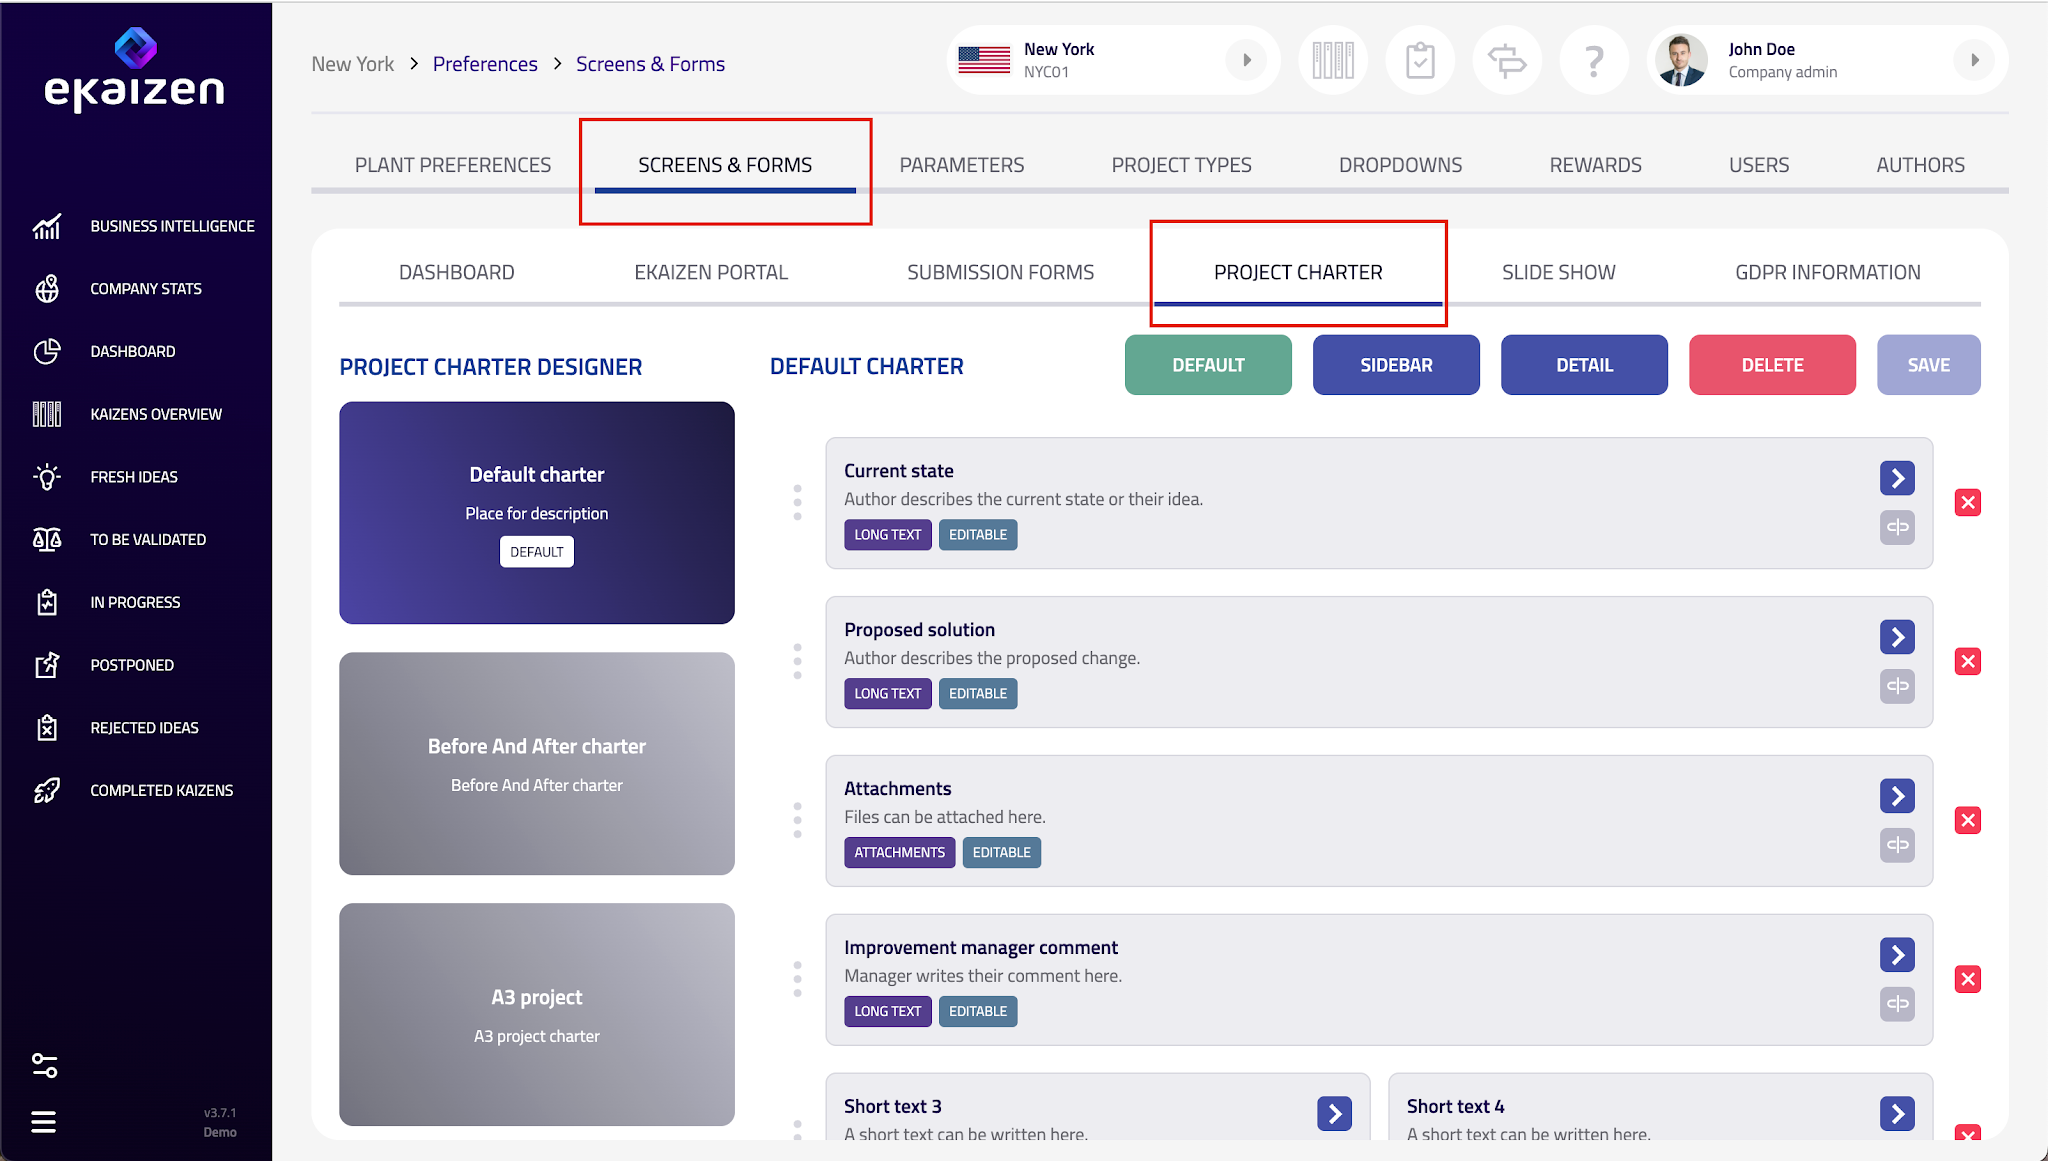
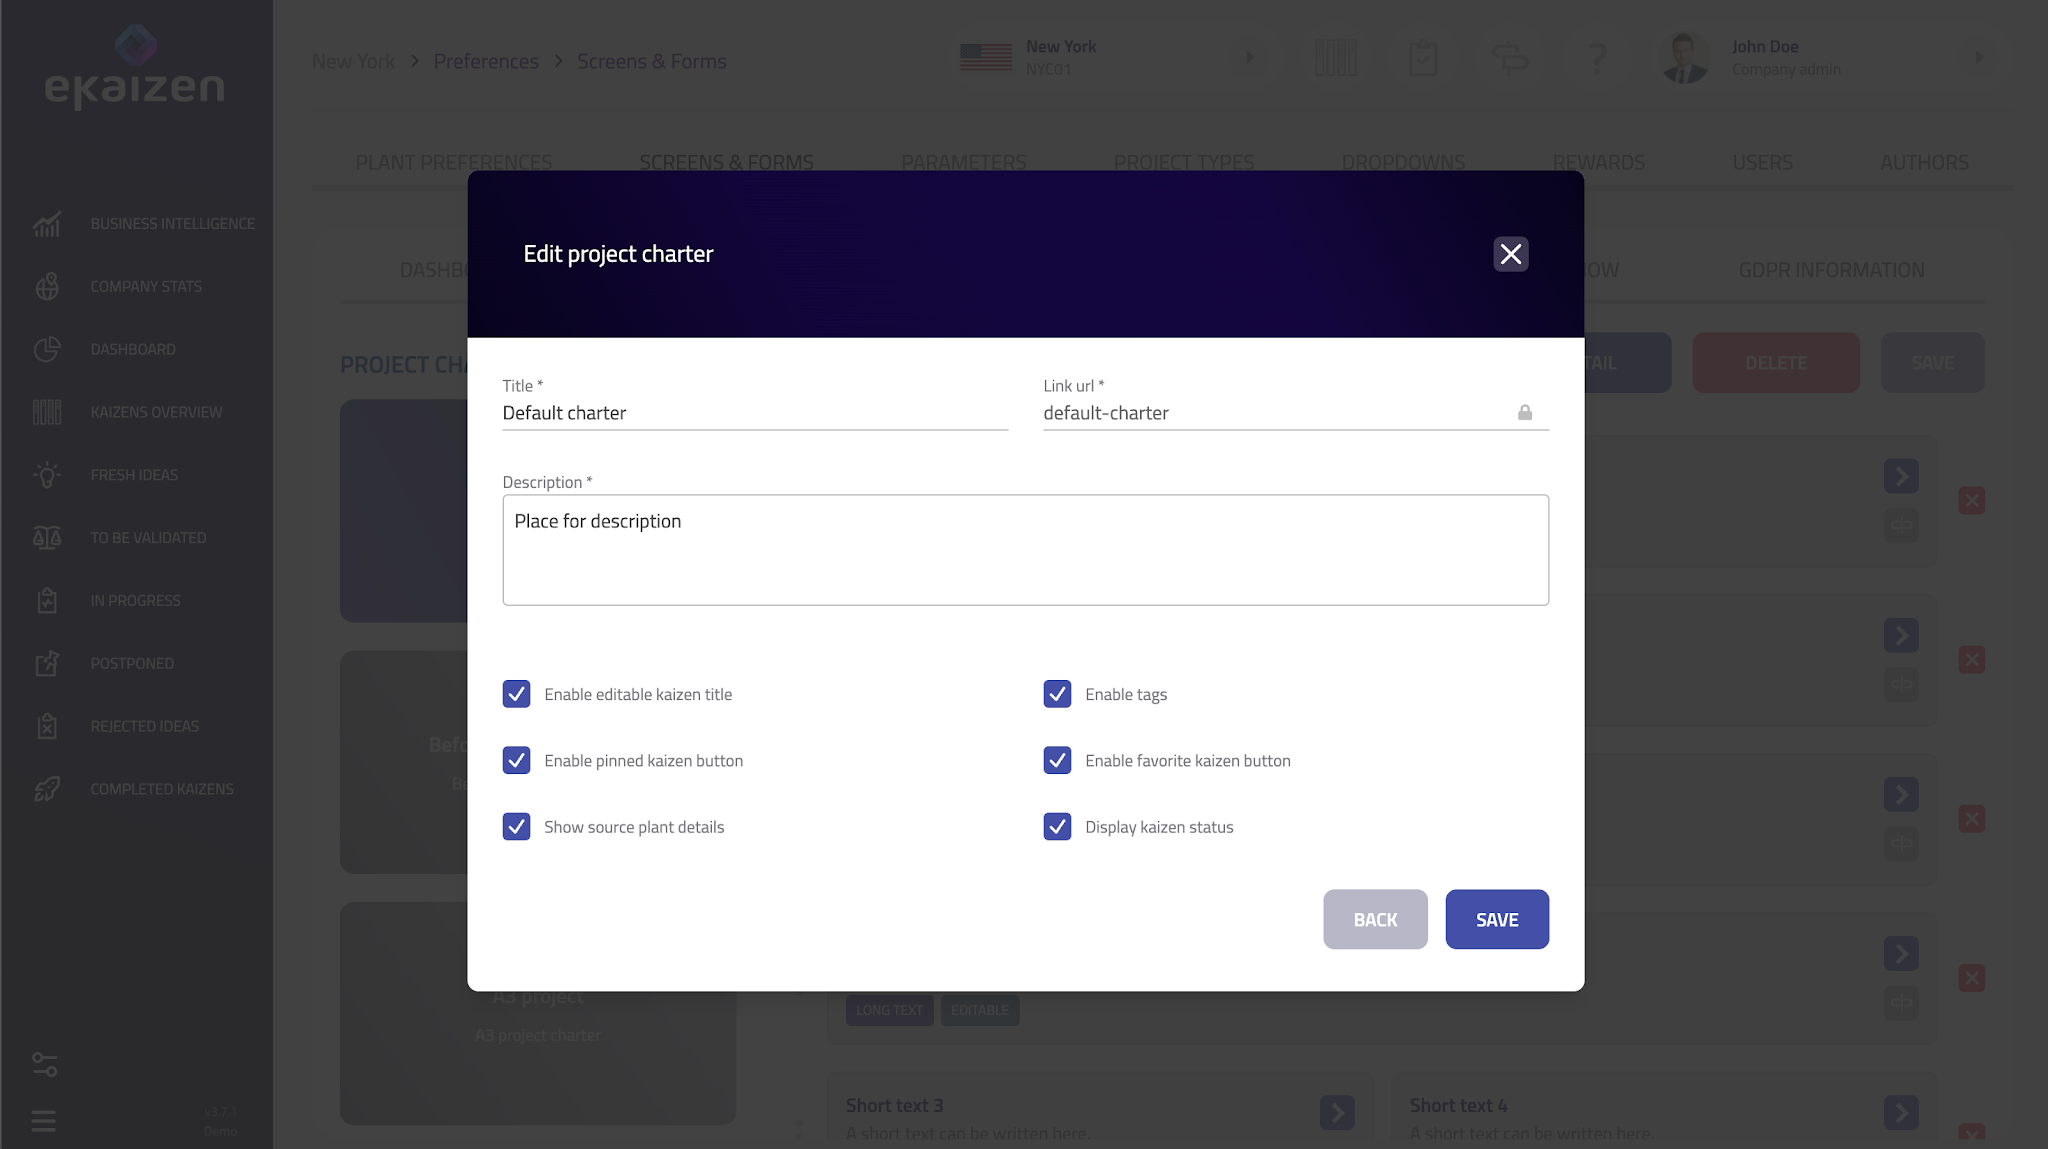
In the top-right corner, click the Detail button to set up:
- Project Charter name – A recognizable name for the charter.
- Description – A brief explanation of its purpose.
- Additional features – Define whether projects using this charter can:
- Be pinned for quick access.
- Be marked as a favorite.
- Have tags assigned.
- Have an editable title.
- Create a New Project Charter or Modify an Existing One
- You can either adjust the default charter or create a new one by clicking + in the left panel.
- Build the Layout
- Click + to add new rows.
- Drag and drop rows into position to create a structured layout.
- Each row can be divided into 1, 2, or 3 columns, depending on how much space is needed for the individual elements (fields) that will be placed into the rows.
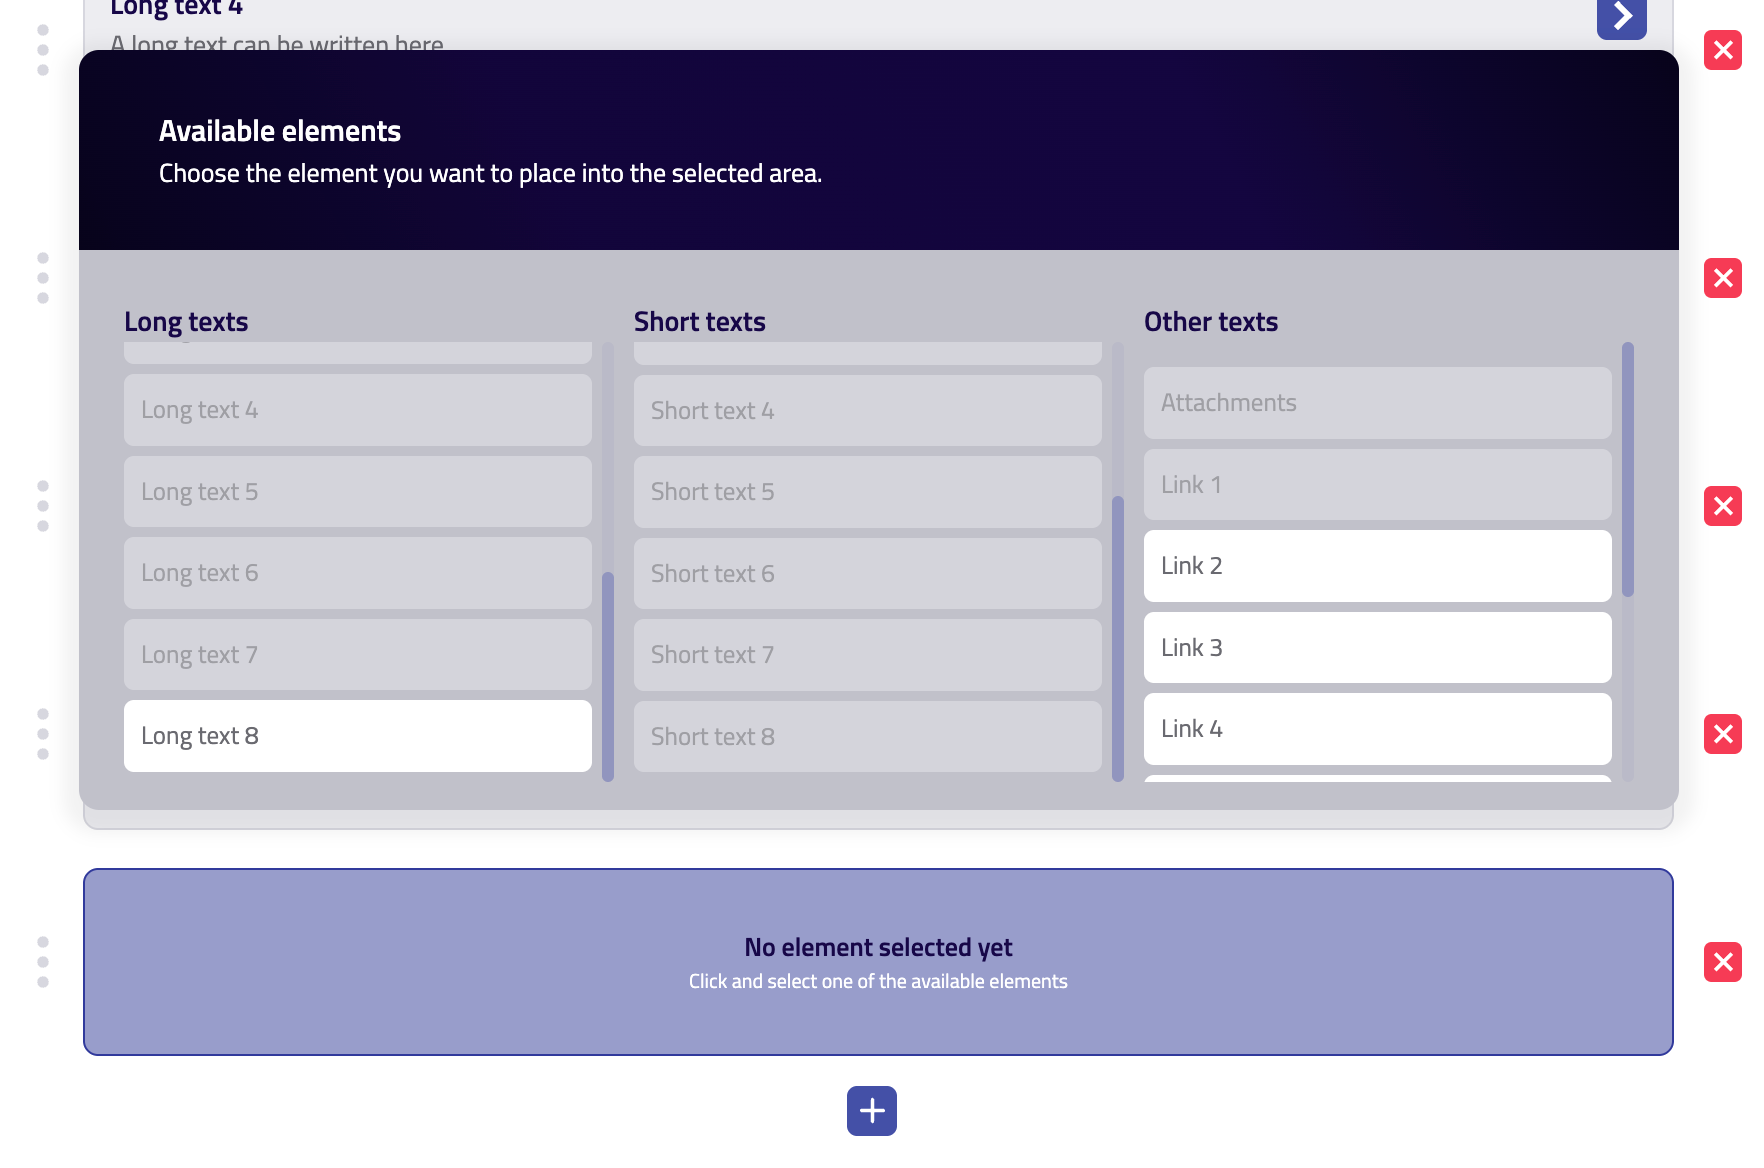
- Available fields include:
- Current State and Proposed Solution – Information submitted by the author.
- Attachments – Supporting documents or images.
- Custom fields from the assigned project type – Text fields, dropdowns, links, or other inputs configured in the project type settings.
- Mark fields as editable or read-only based on whether users should be able to update them (e.g., author-submitted details may remain fixed to preserve the original entry).
- Click the unlink icon if you need to replace or remove an element.
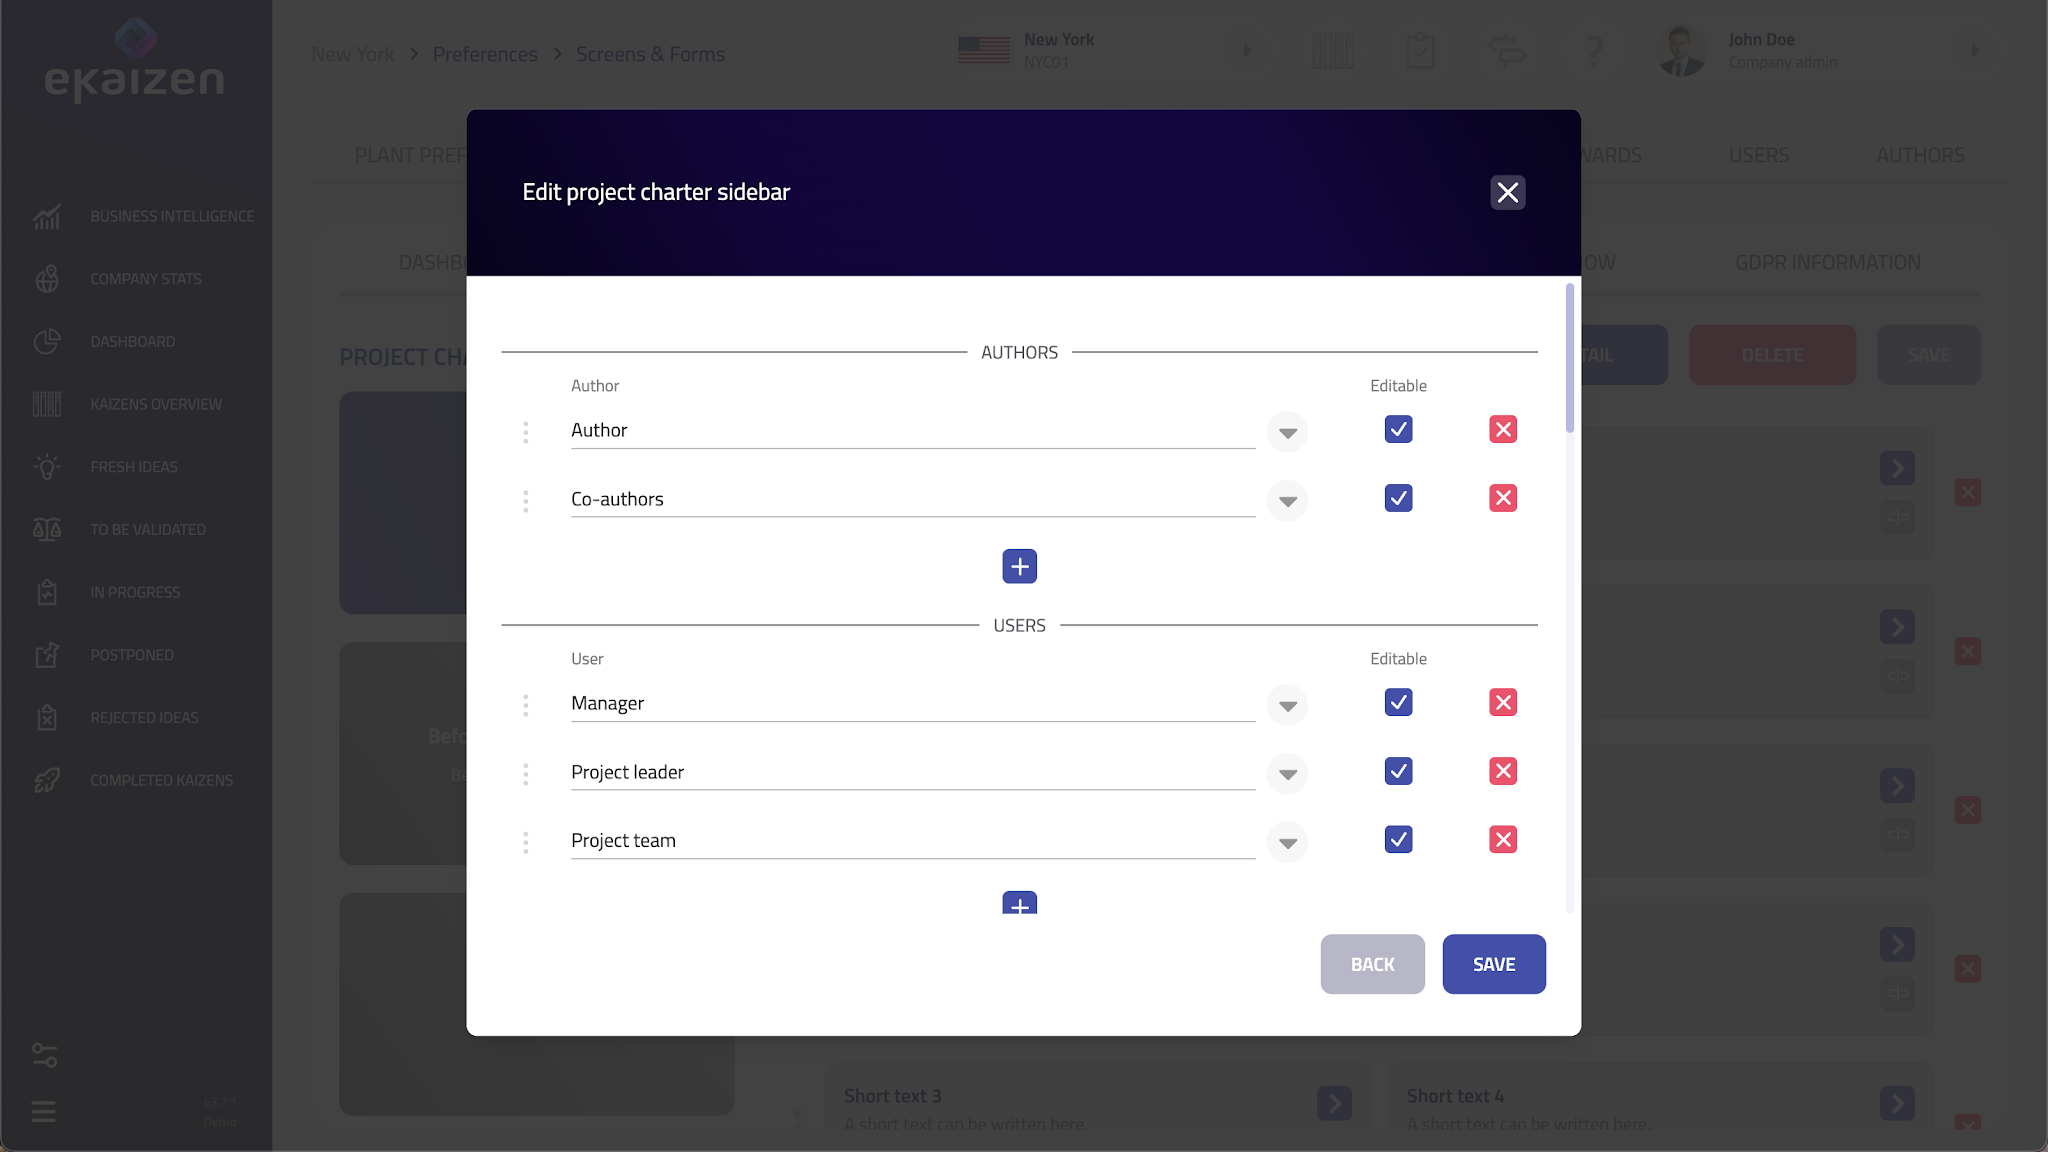
- Configure the Sidebar
- The Sidebar lets you choose which selection fields to include:
- Author and co-authors – Displays submitter details.
- Team – Includes roles like Manager, Project Leader, and Team Members.
- Date fields – Shows key project dates.
- Custom dropdowns – Any additional selection fields defined for the project type.
- Save and Assign to a Project Type
- After finalizing the setup, save changes to ensure updates are applied.
- Mark a charter as default: This will be used if no project type is selected when submitting a new project or if the selected project type does not have a dedicated charter.
- Important final step: Go to Project Type Setup and link this Project Charter to the correct project type so it is used consistently.Didn’t find what you were looking for? Reach out to your administrator, your eKaizen contact person or write to contact@ekaizen.app.
How did we do?
Setting up submission forms
Configuring Main preferences